
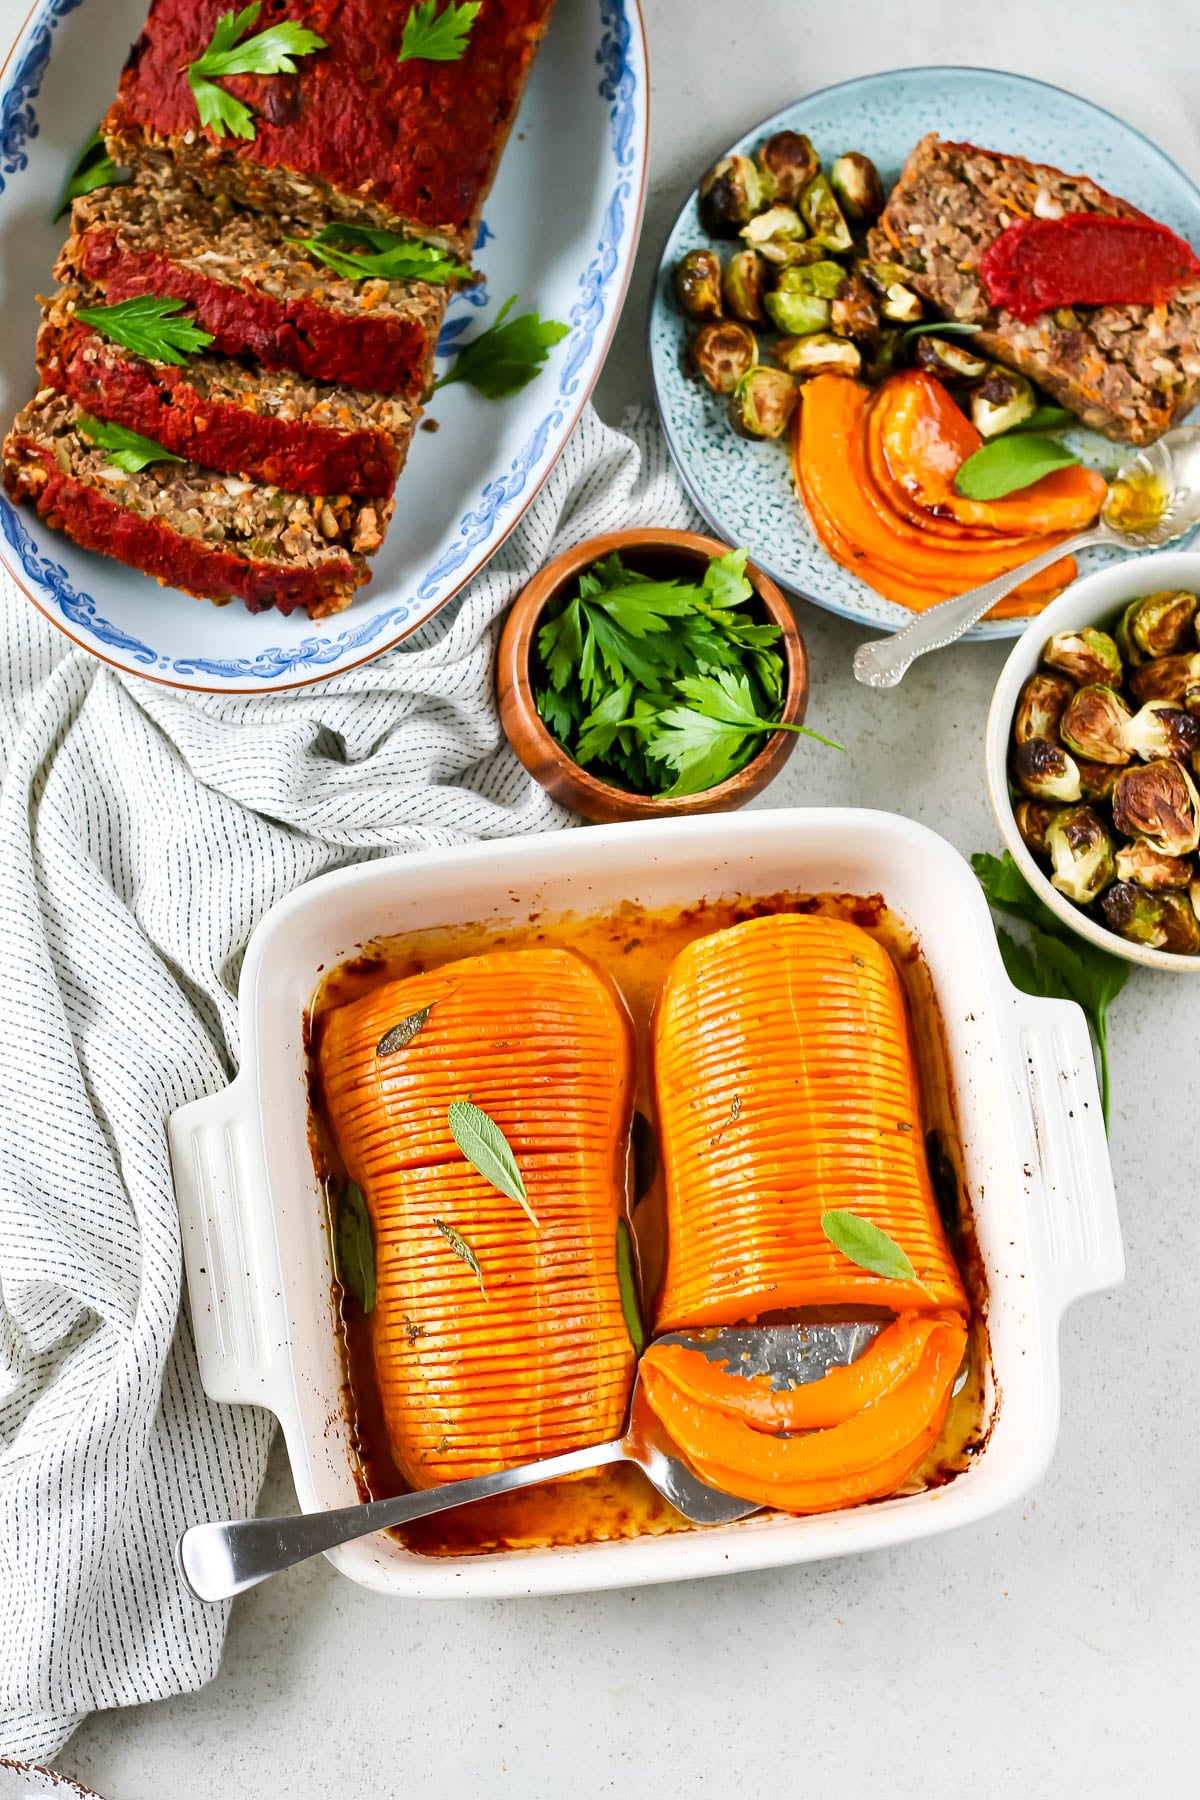
Hasselback Butternut Squash is a stunning yet simple vegetarian side dish that’s perfect for Thanksgiving, Christmas, or any special dinner. The squash is partially roasted for easy slicing, then basted with a ridiculously good maple sage brown butter glaze and roasted again until tender and caramelized. Elegant, flavorful, and surprisingly easy to make — it’s sure to impress your guests.

Stop what you're doing
Listen you guys, I'm not in the business of telling people what to do, but I'm going to need you to do this: Hasselback Butternut Squash. This is THE holiday side dish you've been waiting for.
I mean, sure, you could make some miso maple roasted Brussels sprouts or some vegetarian mashed potato stuffing, and you totally should because those are both delicious sides. But this Hasselback Butternut Squash? With maple sage brown butter? I mean, c'mon.
It's so, so, so, so good. And I promise you, the whole hasselback situation isn't nearly as much of a hassle (see what I did there?!) as you think it might be. Follow the step-by-step instructions below, and you'll have this beauty on your table without even breaking a sweat.
If you haven't had browned butter before ohhhhhhhhhmg are you ever in for a treat. We're going to balance the nuttiness of the browned butter with a bit of maple syrup, and festive up the whole situation with some fresh sage leaves. The whole thing comes together in a vegetable side dish that you will not believe you made.
Truly, it's that good. Let's do this.
Featured Comment
The flavour and look of this was spectacular. It drew ooooooo's and ahhhhhh's from the assembled crowd both when they saw it and again when they tasted it. Thanks Katie, this one's a keeper!
⭐️⭐️⭐️⭐️⭐️ ~ Barbara
Let's make hasselback butternut squash together!
Friends, let me walk you through this step by step. I'll show you my tricks for making this the easiest and most delicious hasselback squash you'll ever make.
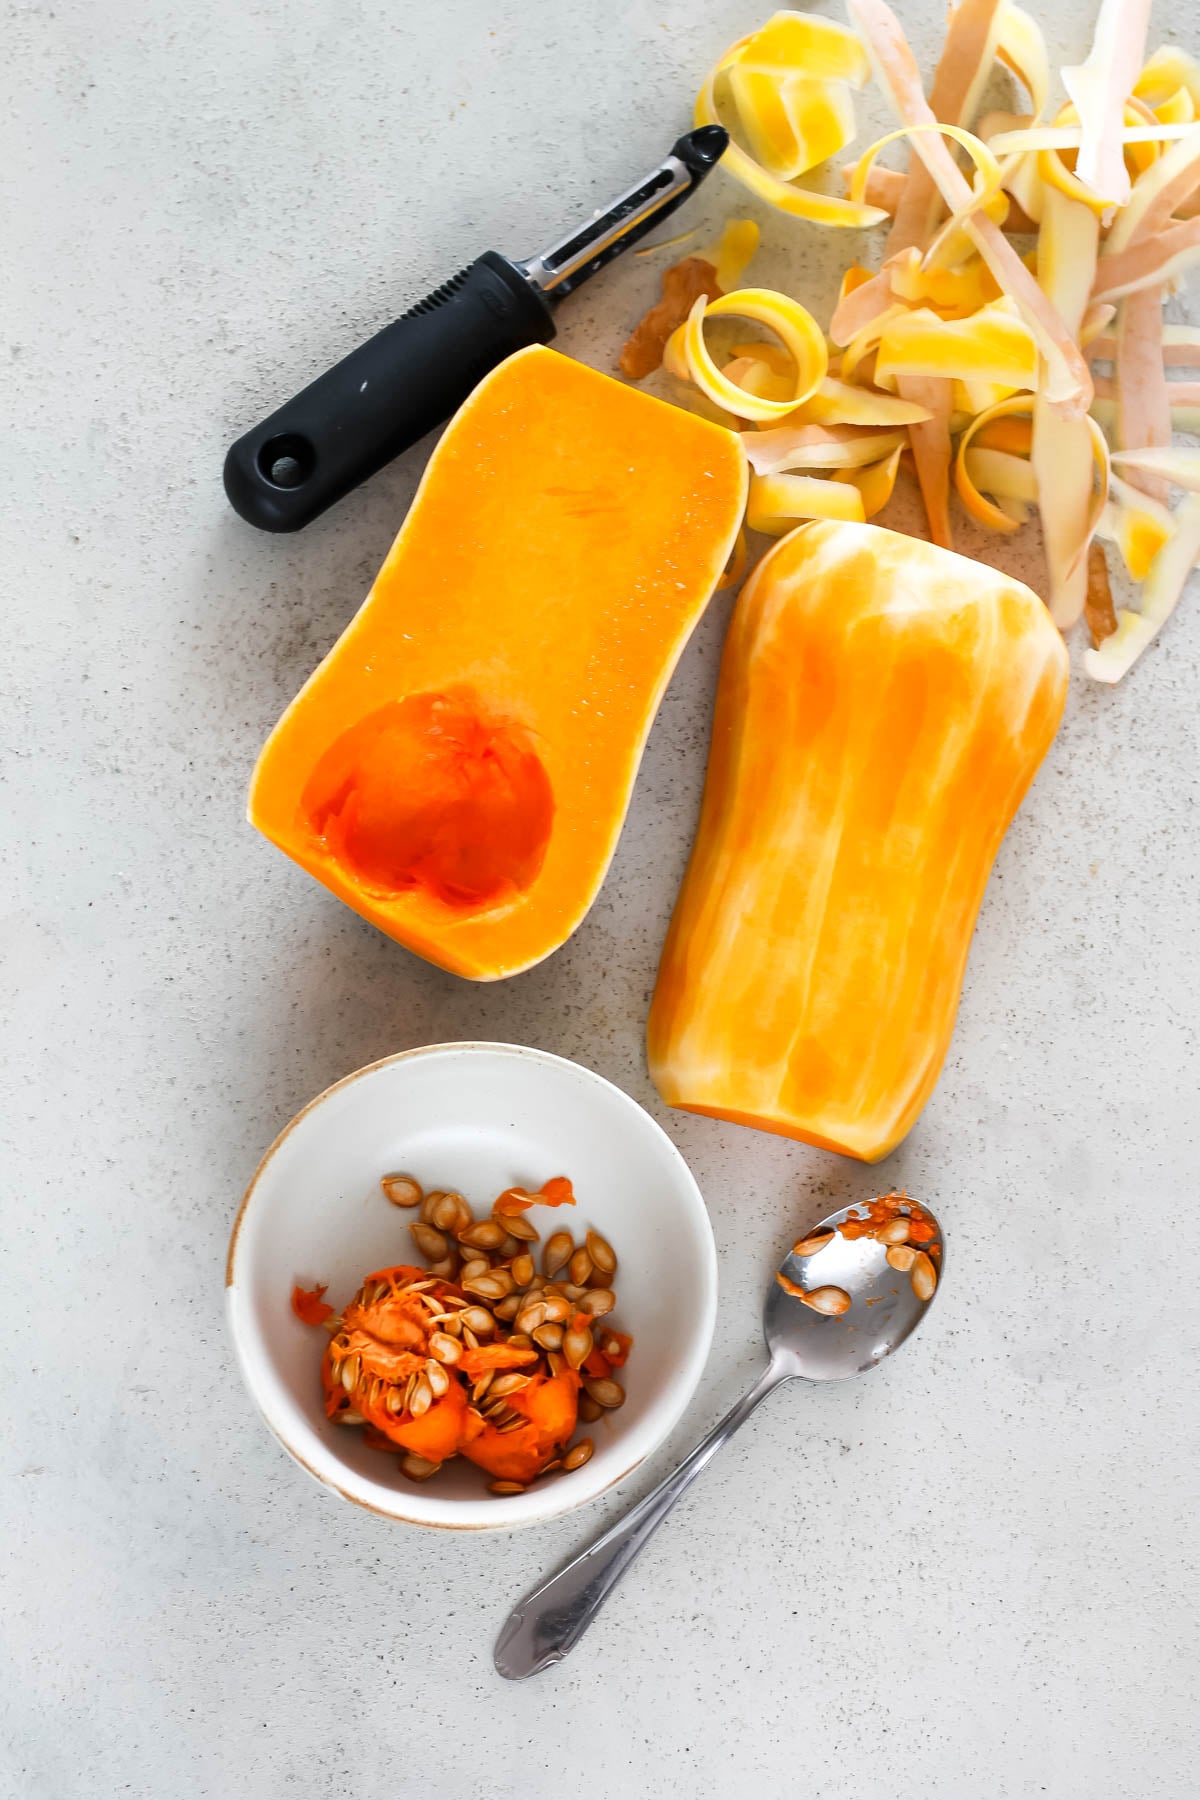
Step 1: prepare your squash
Get started by slicing your squash in half, scooping the seeds out, and peeling the skin off with a vegetable peeler.
Step 2: par-roast the squash
This will make it MUCH easier to slice all those thin slices into it than attempting to hasselback a raw squash. If you value your fingers, do not attempt the slicing without roasting first.

Rub your squash halves with a bit of olive oil, season with salt and pepper, and nestle into an oven-proof baking dish. You'll roast the squash for about 15 minutes at this point.
It should still be quite firm, but you shouldn't have much trouble slipping the tip of a sharp knife into the flesh.
Step 3: brown the butter
While the squash is pre-roasting, make your brown butter!
Add your butter to a small saucepan and place over medium heat to melt. Once melted, continue to simmer on the heat, swirling often.

The butter will get a bit foamy, this is normal. Continue to simmer the butter, swirling often, until it gets nutty and fragrant and a nice deep brown colour.
Transfer the butter to a small bowl to cool slightly; discard the sediment at the bottom of the pot.
Step 4: Hasselback the squash
The trick to hasselbacking squash (or hasselbacking anything, for that matter) is to make thin, uniform slices that go about ¾ of the way through.
Since we've already par-roasted our squash, the slicing will be much easier. The other trick I like to use is lining up a wooden spoon on either side of the squash to act as guides for the knife. This will ensure you don't accidentally slice all the way through.

I also recommend starting your slicing at the thinner, more stable end of the squash and finishing with the wider, hollow end, which will be a bit tricky.
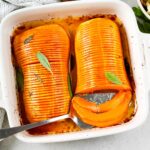
Step 5: baste + bake
Return the sliced squash to the baking dish.
Whisk the brown butter together with maple syrup and finely chopped sage leaves. Using a silicon brush, liberally brush the squash with this mixture, making sure it dribbles into all the cracks.

Place the baking dish back into the oven and roast for another 30 minutes, until soft and golden. I like to kind of baste the squash with the maple brown butter mixture once or twice during the roasting time.
Step 6: cool + serve
Remove the squash from the oven, let cool ever so slightly, and serve.
(I've read some recipes that suggest you should transfer the cooked hasselback squash to a pretty serving dish before serving. This is insanity. Serve it in the dish you baked it in!)
Easy Hasselback Butternut Squash with Maple Sage Brown Butter
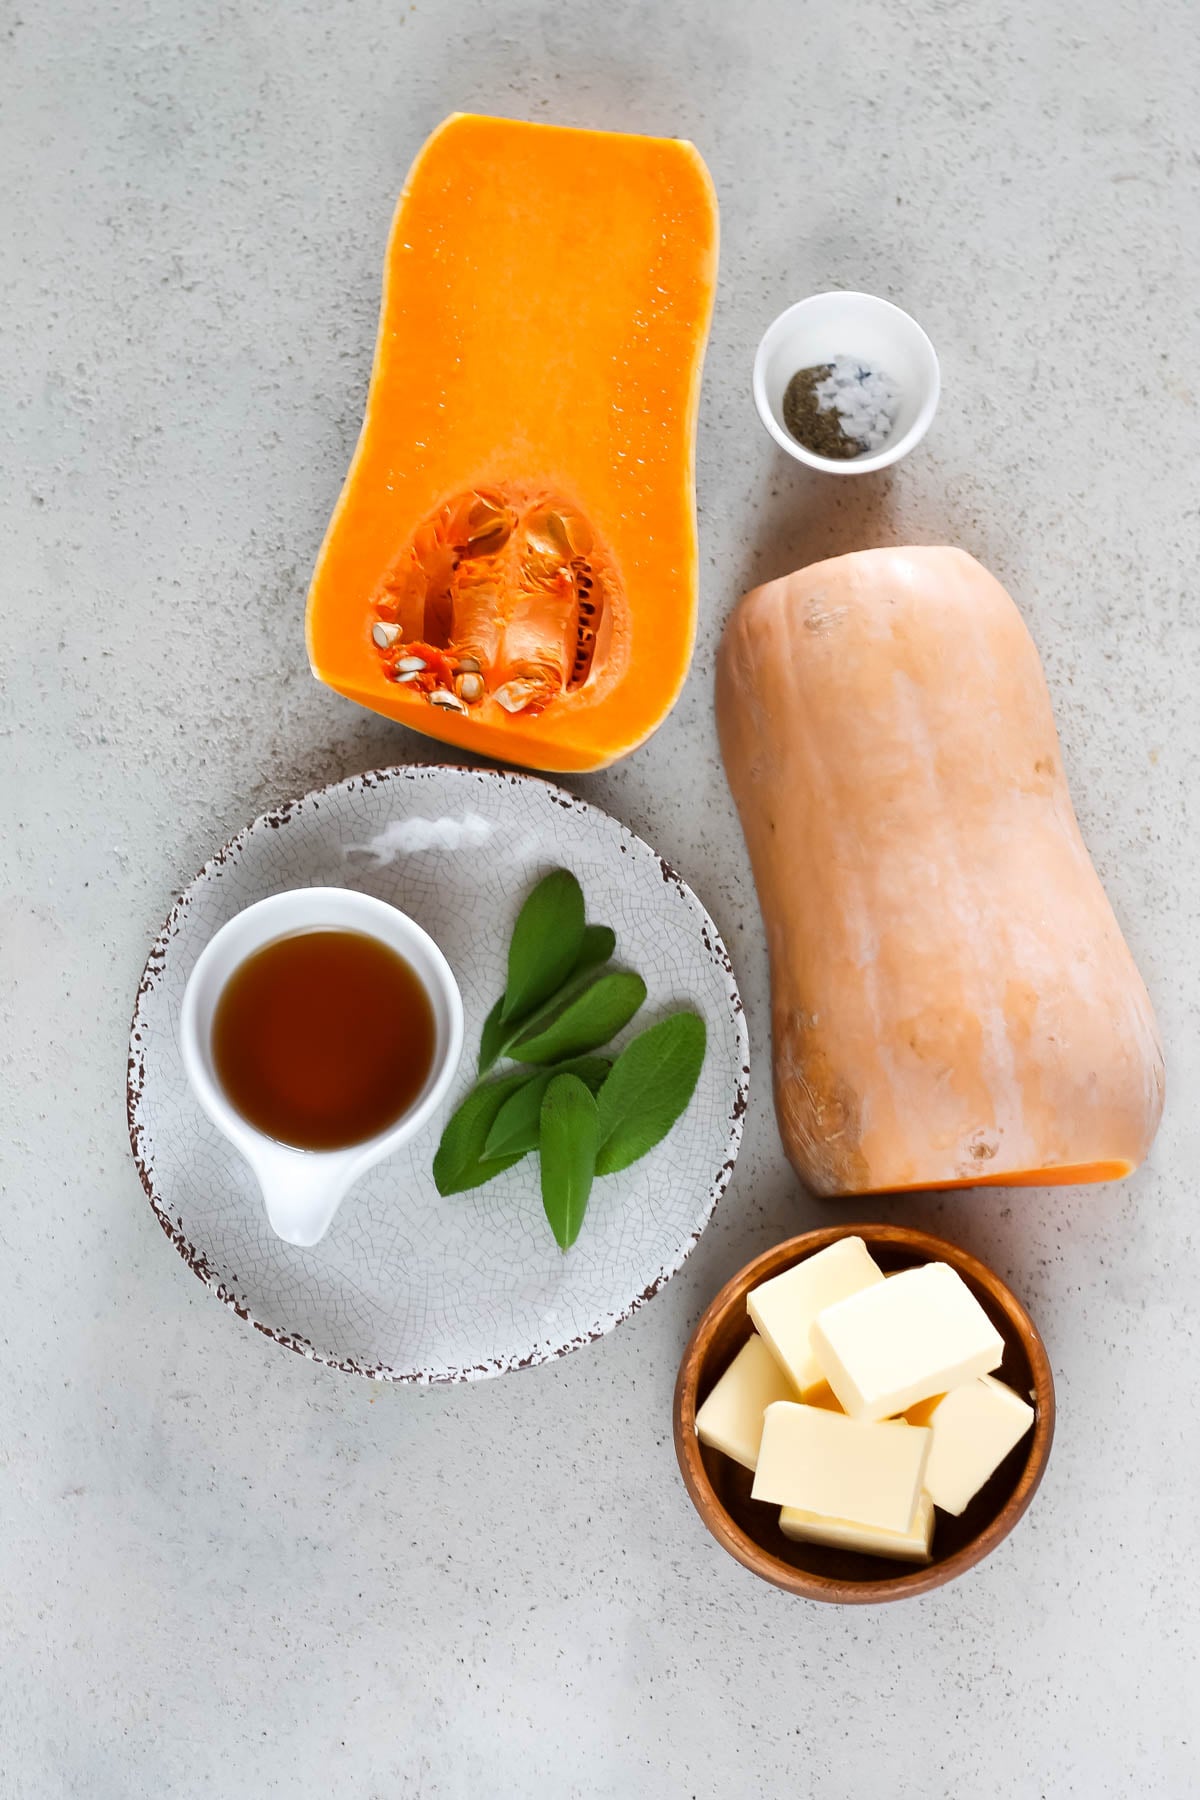
Ingredients
- 1 medium butternut squash about 2 pounds
- 2 teaspoon extra virgin olive oil
- salt and pepper
- ½ cup unsalted butter
- 2 Tablespoons maple syrup
- 1 Tablespoon finely chopped sage leaves or 1 teaspoon fresh sage
- pinch fine grain sea salt
Instructions
Prepare the squash
- Pre-heat your oven to 200°C / 400°F.
- Slice the squash in half and remove the seeds. Use a vegetable peeler to remove all of the skin.1 medium butternut squash
- Rub the squash halves with olive oil, and season with salt and pepper. Place into a baking dish. Roast for 15 minutes.2 teaspoon extra virgin olive oil, salt and pepper
Make the brown butter
- Put the butter in a small saucepan over medium heat.½ cup unsalted butter
- Once melted, allow the butter to simmer, swirling the pan every minute or so.
- The butter will foam up; this is normal. Keep watching closely and swirling often as it will turn brown very quickly.
- Remove from the heat and transfer the butter into a small bowl, leaving the sediment behind.
- Add the maple syrup, minced sage leaves, and a pinch of salt to the brown butter.2 Tablespoons maple syrup, 1 Tablespoon finely chopped sage leaves, pinch fine grain sea salt
Hasselback the squash
- Transfer the par-cooked squash halves to a cutting board and place a wooden spoon on either side.
- Using a sharp knife, slice ¾ of the way through the squash. Repeat, making thin slices along the entire length of the squash.
- Repeat with the second squash half, and then return to the baking dish.
- Using a silicon brush, liberally brush the sliced squash halves with the maple brown butter.
- Return the squash to the oven and roast for another 30 minutes until soft and golden. Baste the squash with the brown butter mixture once or twice during the roasting time.
- Allow the squash to cool slightly, then serve.
Notes
- Nutrition values are an estimate only.
- Butternut squash halves can be par-roasted up to 2 days in advance.
- The brown butter can be made up to 2 days in advance and kept in the fridge until you're ready.
Wren says
We have done hassleback potatoes, which we love, but the butternut squash version is hands down one of our new favorite dishes. I was skeptical about the maple syrup but it added a nice balance to the flavor with out making it too sweet. Will definitely be making this again!
Katie Trant says
Hey Wren! So glad you enjoyed this one. The maple syrup together with the browned butter is such a good combination. Really can't be beat!
Barbara Young says
The flavour and look of this was spectacular. It drew ooooooo's and ahhhhhh's from the assembled crowd both when they saw it and again when they tasted it. Thanks Katie, this one's a keeper!
Kellie Anderson says
Thanks for the recipe idea nod. I was really pleased with that one. Like you say, so much easier than it looks. Love the brown butter action on yours and the step by step for those who feel intimidated by the whole thing. 🙂